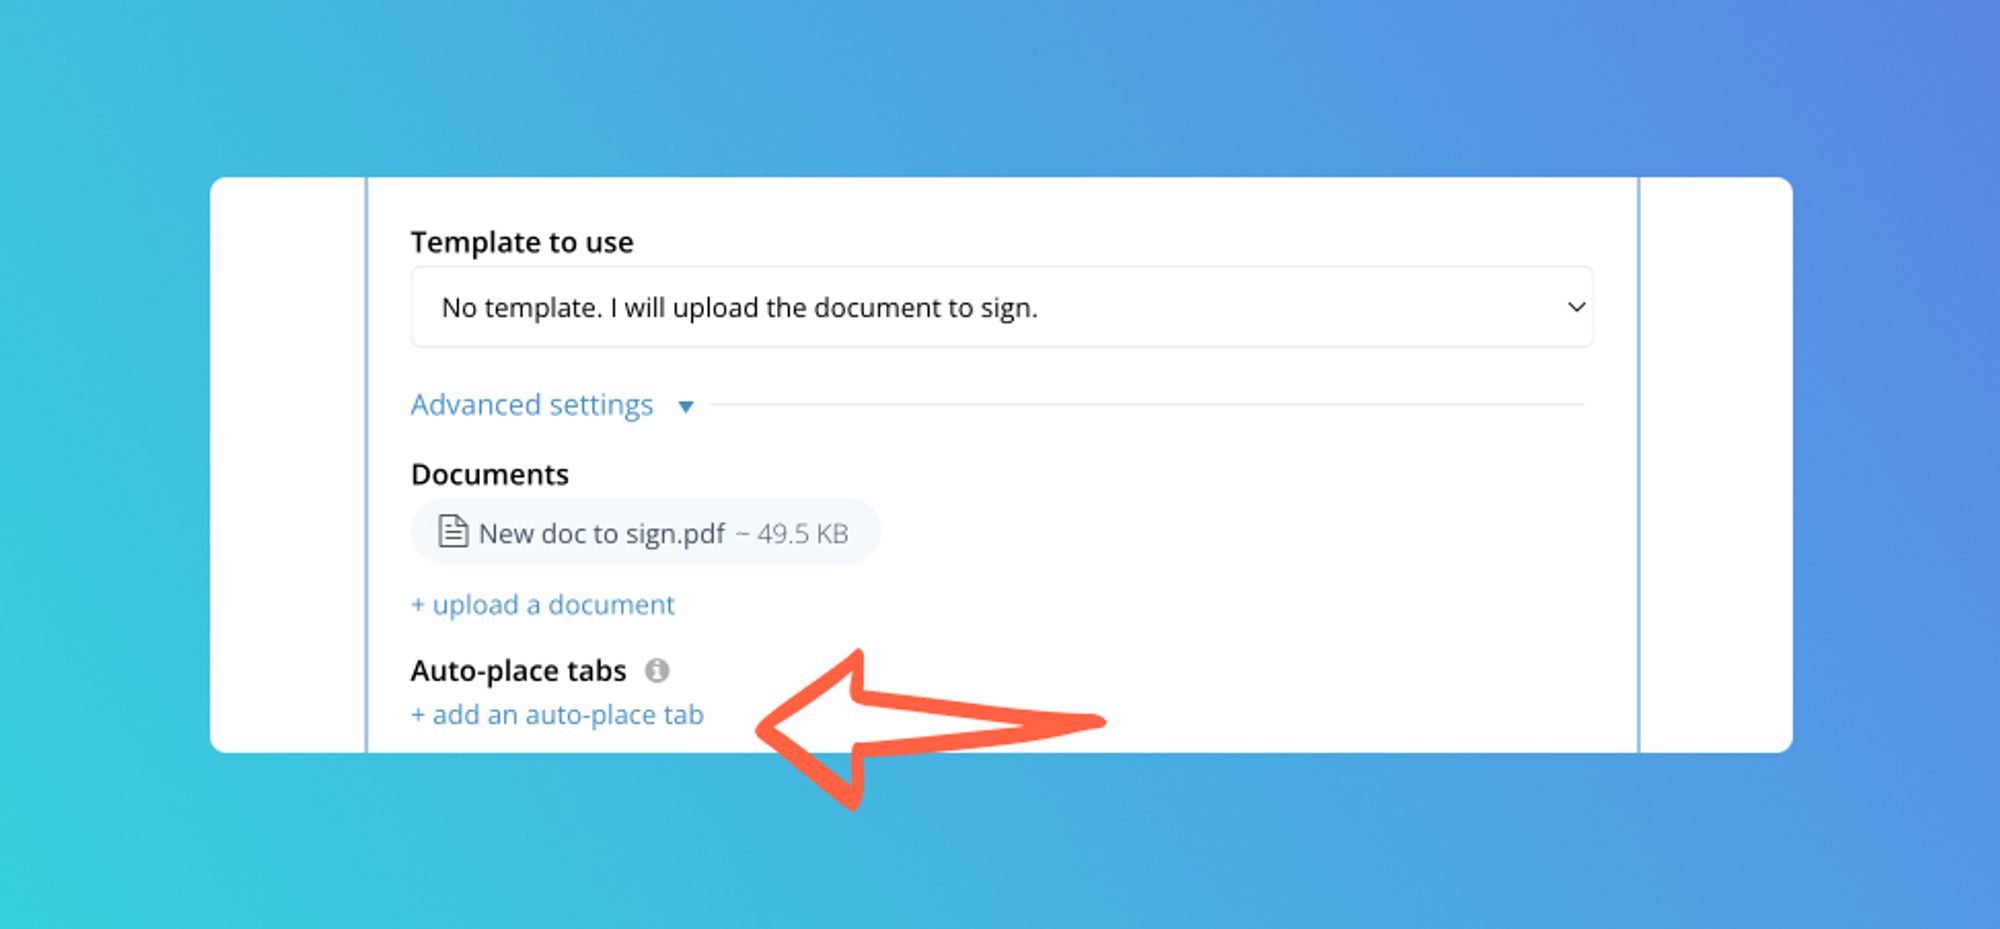
When uploading documents to sign directly from Collect, you can insert text and signature zones using "auto-place" tabs.
Auto-place tabs in DocuSign allow for the automatic placement of signature and other fields in a document. This is useful for documents with many fields or documents that require a signature in a specific location. With auto-place tabs, you can simply upload a document and let DocuSign automatically place the required fields. For example, "/signhere/" can be replaced by a sign tab.
To add an auto-place tab in Collect, click on "Add an auto-place tab" when creating your e-signature element.
The anchor string is the value that Docusign will look like in your document to place the new tab. We recommend to use something specific (ex: /signhere/).
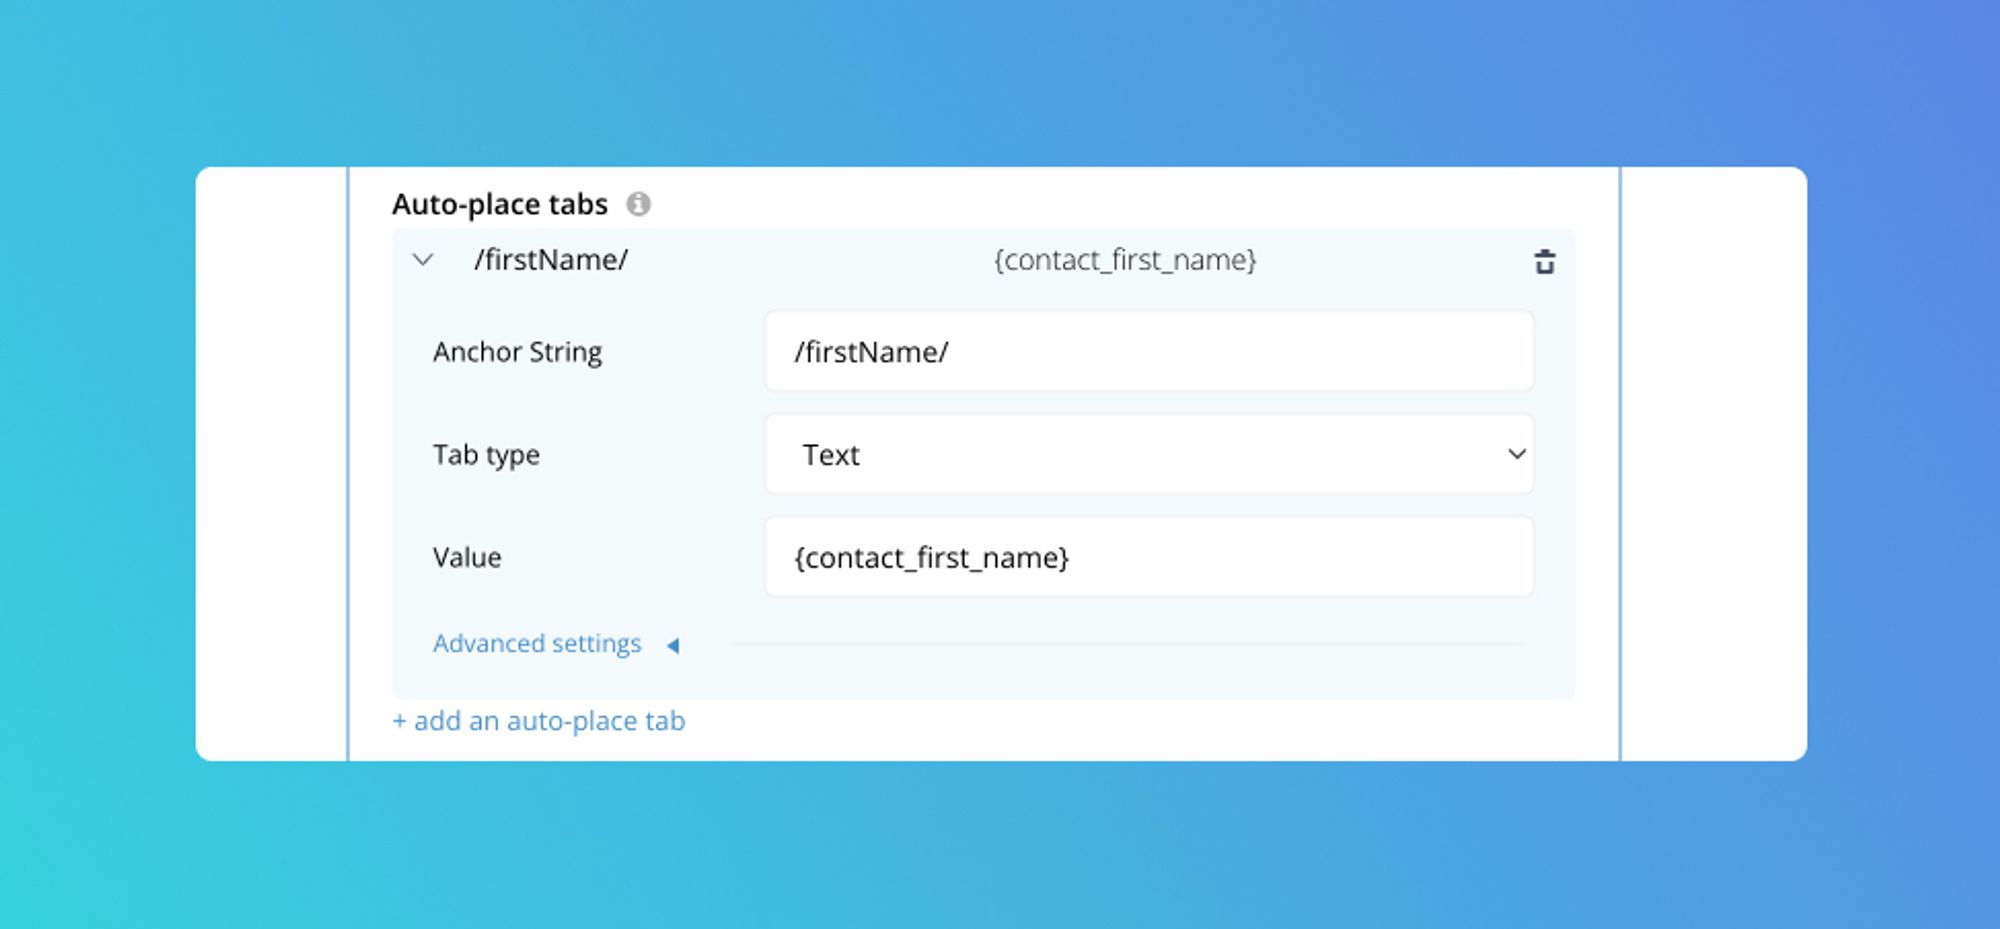
There are two types of auto-tabs that can be used with Collect: text tabs and sign-here tabs.
To use a text tab, you need to assign a value to it. You can use "Collect variables" to do so. For example, {contact_first_name} will be replaced by the first name of your main contact.
A sign-here tab will be automatically replaced by a signature tab.
In the advanced settings section, you can specify the position of the tabs (unit, x-offset, y-offset) and even define the font and font size for text tabs.